I thought I would share a tutorial on making these great paper snowflakes. They take a little time but they are so beautiful when they are done. Hope you have fun making them! So here we go...
Supplies:
Six sheets of 12" X 12" decorative paper. 3 each of 2 designs that coordinate.
Metal ruler
Xacto knife
Something to cut on.
1 sheet of a heavier weight paper to make a template
Stapler
Directions:
Start out by drawing this template onto a heavier piece of paper, I used a tag board. You can see how the lines don't completely connect at the corners...this is important. Unfortunately I can't remember the exact dimentions of each row. It's a little bit wider than 1" maybe 1 1/4". Once you get the lines drawn on you can cut them open with an xacto knife. Be sure to have a good cutting surface below the paper.
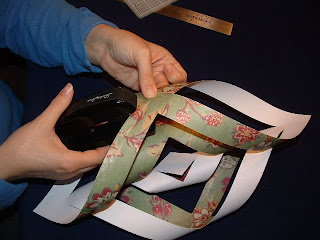
Once you have transfered the lines onto your decorative paper and cut them you will need your stapler to attach the ends like is shown in the picture above. Each section will go in the opposite direction like you see in the picture below.
Once you get the sections completed you will attach 3 together to make each half. Make sure to rotate your colors so every other section is a different paper as shown below.
Attach sections with your stapler in the middle and center points.
Once you get the halves made you can attach the 2 halves to make a whole snowflake.
These are quite large and very pretty. We hung ours with fishing line.
Have fun!
Meagan


I love your snow flakes. It looks like you have a very fun class to be in. Many years ago I went to a country school. There were 5 in my class, but 32 in the school. Very much like Little house on the Prairie only we all had out own text books. I am Noels grandmother. I enjoyed hearing her read. Thank You for sharing. Ruth Lloyd
ReplyDelete